How to Zero in a Red Dot Sight: Expert Tips for Accuracy
Zeroing in a red dot sight is crucial for accurate shooting. It ensures that your aim is true.
A red dot sight can significantly improve your shooting accuracy, whether you are a hunter, target shooter, or in a tactical situation. But, aligning your sight correctly is key. Many shooters struggle with this task, but it doesn’t have to be complicated.
With a few simple steps, you can zero in your red dot sight and enhance your shooting performance. In this guide, we’ll break down the process into easy-to-follow steps. You’ll learn how to adjust your sight for precision and confidence in your aim. Get ready to hit your target every time. Let’s dive in!
Choosing The Right Red Dot Sight
Choosing the right red dot sight is crucial for accurate shooting. A good sight can make a big difference. You need to understand the types available and the features they offer. This guide will help you choose the best red dot sight for your needs.
Types Of Red Dot Sights
Red dot sights come in different types. Here are the main ones:
- Tube Red Dot Sights: These look like traditional scopes. They are durable and offer good protection.
- Open Red Dot Sights: Also known as reflex sights. They are lighter and offer a wider field of view.
Choose based on your preferences and the type of shooting you do.
Features To Consider
When choosing a red dot sight, consider these features:
| Feature | Description |
|---|---|
| Reticle Size | Smaller reticles are more precise. Larger reticles are faster to acquire. |
| Brightness Settings | Adjustable brightness is useful in different lighting conditions. |
| Battery Life | Longer battery life means less frequent changes. |
| Mounting Options | Ensure the sight can mount on your firearm. Check compatibility. |
| Durability | Look for waterproof and shockproof features. |
These features will help you choose the best red dot sight for your needs.
Mounting The Red Dot Sight
Mounting a red dot sight involves attaching it securely to your firearm. Align the sight with your target. Adjust the elevation and windage knobs to zero in. Once the sight is securely mounted and aligned, you should conduct practice shots to ensure accuracy. Sighting in a red dot requires patience, so take your time to make small adjustments as needed until you achieve the desired alignment with your target. Remember to consistently check that the sight remains secure after each shooting session to maintain optimal performance.
Mounting a red dot sight correctly is crucial for accurate shooting. Poor mounting affects precision and stability. Follow these steps to ensure your sight is mounted properly.Proper Positioning
First, find the right spot on the rail. The sight should be close to your eye. This helps with quick target acquisition. Avoid placing it too far forward. This can strain your eyes and make aiming harder. Test different positions. Find what feels most comfortable.Securing The Sight
Once positioned, ensure the sight is secure. Tighten the mounting screws firmly. Use a torque wrench if possible. This prevents over-tightening and damage. Check the alignment. The sight should be straight with the barrel. Make adjustments if necessary. A secure mount ensures stability and accuracy during use.Initial Setup And Adjustments
Setting up and adjusting a red dot sight can be simple. Start with a stable shooting platform. Use a bench rest or sandbags. These help reduce movement.
Ensure the sight is mounted securely. Check the screws and mounts. Tighten them as needed. A loose sight can cause inaccuracy.
Aligning The Reticle
Turn on the red dot sight. Point it at a target. Align the dot with the target’s center. Adjust the windage and elevation knobs. Move the dot horizontally and vertically until it matches the target.
Use small adjustments. Check the alignment after each change. Repeat until the dot is centered.
Setting The Brightness
Find the brightness control on your sight. Adjust it to a comfortable level. Too bright can obscure the target. Too dim can be hard to see.
Try different settings in various light conditions. Ensure the dot is visible, but not overpowering. This helps in different environments.

Credit: www.youtube.com
Establishing A Solid Shooting Position
Stance And Grip
Begin by maintaining a stable stance with feet shoulder-width apart and knees slightly bent.
Focus on a firm grip ensuring control over the weapon.
Consistent Cheek Weld
Ensure a consistent cheek weld to the stock for proper eye alignment with the red dot sight.
Adjust your head position to maintain a clear sight picture.
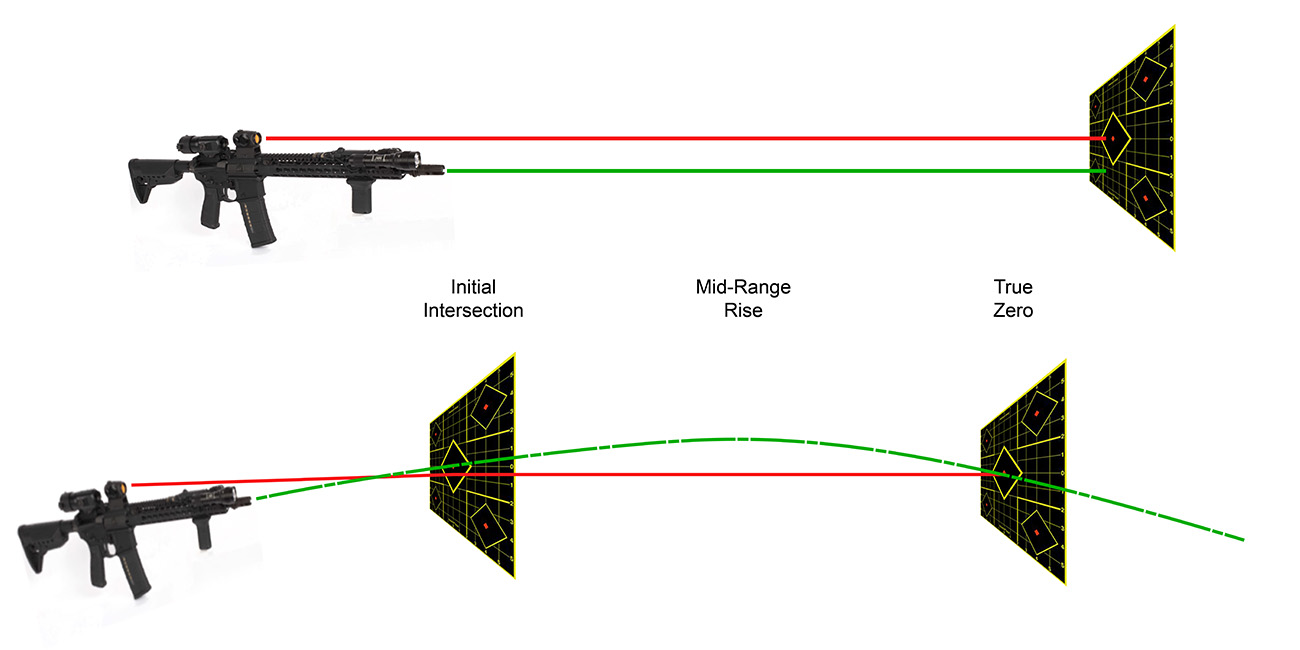
Zeroing At A Short Distance
Zeroing a red dot sight at a short distance is essential. This practice ensures accuracy and reliability. Follow these steps to make the process smooth and effective.
Selecting A Target
Choose a target that is easy to see. A large paper target with a clear center works well. Place it at a distance of 25 yards. This distance is ideal for short-range zeroing. Ensure the target is stable. Any movement can affect your accuracy.
Firing Initial Shots
Take a comfortable shooting position. Aim at the center of the target. Fire three to five shots. Check the impact points on the target. These shots help you understand where your sight is aiming. Adjust the red dot accordingly. Move the dot in the direction of the missed shots. Repeat the process until your shots hit the center.

Credit: www.youtube.com
Making Windage And Elevation Adjustments
Adjusting windage and elevation is crucial for accurate shooting. It ensures your red dot sight aligns perfectly with the target. This process can seem daunting, but with a clear understanding of the knobs and proper adjustments, you can achieve pinpoint accuracy.
Understanding The Knobs
Red dot sights have two main adjustment knobs: windage and elevation. These knobs help you fine-tune the sight.
- Windage Knob: Adjusts the sight horizontally (left or right).
- Elevation Knob: Adjusts the sight vertically (up or down).
Typically, the windage knob is on the side of the sight. The elevation knob is on the top. Each click of the knob moves the sight a small, measured distance. This distance is usually marked in MOA (Minute of Angle) or MIL (Milliradian).
Adjusting For Accuracy
Before making adjustments, ensure the red dot sight is securely mounted. A loose mount can cause inaccuracies.
- Set up a target at a known distance, commonly 25 or 50 yards.
- Take a few test shots to see where the bullets hit in relation to the red dot.
- If the shots are to the right of the target, turn the windage knob left. If to the left, turn it right.
- If the shots are high, turn the elevation knob down. If low, turn it up.
- After each adjustment, take another test shot. Repeat until the red dot and the bullet impact align.
Remember, minor adjustments can make a significant difference. Take your time to make precise changes.
| Knob | Direction to Turn | Result |
|---|---|---|
| Windage | Left | Moves point of impact left |
| Windage | Right | Moves point of impact right |
| Elevation | Up | Moves point of impact up |
| Elevation | Down | Moves point of impact down |
Once satisfied with the adjustments, secure the knobs. This prevents them from moving during use. Now, your red dot sight should be accurately zeroed in, ready for precise targeting.
Confirming Zero At Longer Distances
Confirming zero at longer distances is crucial for accurate shooting. After zeroing your red dot sight at a short range, you must test it at longer ranges. This ensures your sight remains accurate and reliable.
Increasing The Range
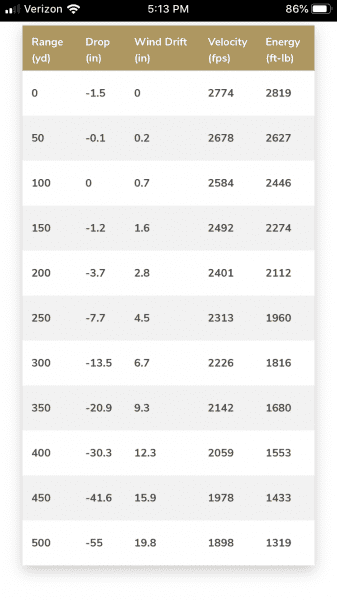
Start by moving your target to 50 yards. Shoot a few rounds and check the impact points. Adjust the sight if needed. Then, move the target to 100 yards. Repeat the process. This helps in verifying your sight’s accuracy over longer distances.
Verifying Accuracy
Once the target is at 100 yards, focus on your shooting technique. Maintain a steady aim and consistent trigger pull. Fire a group of shots and observe the pattern. Consistent hits mean your sight is correctly zeroed. If not, make small adjustments to your red dot sight.
Repeat the process at even longer distances if necessary. The goal is to ensure your sight remains accurate across different ranges. This makes a significant difference in real-world shooting scenarios.
Maintaining Your Red Dot Sight
Maintaining your red dot sight is crucial for consistent performance. A well-maintained sight ensures accuracy and reliability. Regular upkeep extends the life of your equipment.
Regular Cleaning
Regular cleaning keeps your red dot sight in top condition. Dust and debris can affect visibility. Use a soft cloth to wipe the lens. Avoid harsh chemicals. They can damage the coating on the lens.
Check the battery compartment. Ensure it is free from corrosion. Replace batteries as needed. Clean the exterior of the sight with a damp cloth. This prevents dirt buildup.
Checking Mount Stability
Check the mount stability often. A loose mount affects accuracy. Use a screwdriver to tighten any loose screws. Ensure the mount is secure on the rail.
Inspect the mounting hardware for wear and tear. Replace any damaged parts promptly. A stable mount keeps your red dot sight aligned.

Credit: www.thesoutherntrapper.com
Frequently Asked Questions
What Is The Best Distance To Zero A Red Dot Sight?
The best distance to zero a red dot sight is typically 25 to 50 yards. This range ensures accuracy for most shooting scenarios.
How Do You Adjust A Red Dot Sight?
To adjust a red dot sight, use the windage and elevation knobs. Follow the manufacturer’s instructions for precise adjustments.
How Long Does It Take To Zero A Red Dot Sight?
Zeroing a red dot sight can take about 15 to 30 minutes. The time depends on experience and equipment used.
Why Is My Red Dot Sight Off Target?
Your red dot sight may be off target due to improper mounting or incorrect zeroing. Recheck the alignment and zeroing process.
Conclusion
Achieving accuracy with your red dot sight takes patience and practice. Follow these steps. Ensure your sight is securely mounted. Adjust for windage and elevation carefully. Use consistent shooting techniques for best results. Regularly check your sight for any misalignment.
Practice often to maintain your skills. Remember, consistency is key to precision. With time, your shooting accuracy will improve. Happy shooting!


