How to Sight in a Thermal Scope: Expert Tips for Precision
Sighting in a thermal scope is crucial for accurate shooting. It ensures your shots hit the target every time.
Thermal scopes are unique tools that detect heat instead of light. This makes them perfect for night hunting or surveillance. But, sighting in a thermal scope can be tricky if you’re new to it. It involves aligning the scope with your weapon so that the point of impact matches your aim.
This blog will guide you through the steps to achieve this. You’ll learn how to adjust your scope and practice until your shots are precise. Understanding these basics will improve your accuracy and confidence in using your thermal scope. Stay tuned for a straightforward, step-by-step guide to get you started.

Credit: www.opticscentral.com.au
Choosing The Right Thermal Scope
Selecting the right thermal scope is crucial for accurate sighting. It impacts your shooting accuracy and overall experience. There are various factors to consider. Let’s explore the different types of thermal scopes and key features to look for.
Different Types Of Thermal Scopes
There are several types of thermal scopes. Handheld thermal scopes are portable and easy to use. Clip-on thermal scopes attach to your existing optics. Standalone thermal scopes offer built-in reticles and advanced features.
Key Features To Consider
First, consider the resolution. Higher resolution provides clearer images. Next, think about the refresh rate. A higher refresh rate means smoother visuals. Also, check the detection range. Longer ranges are better for distant targets.
Look for a scope with a good battery life. You don’t want it to die in the field. Check the weight and size. Lighter scopes are easier to handle. Finally, consider the price. Balance your budget with the features you need.

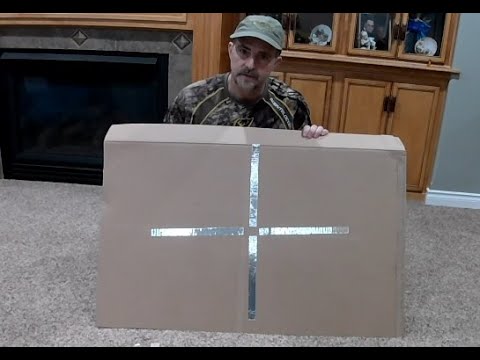
Credit: www.youtube.com
Mounting The Thermal Scope
Mounting the thermal scope is a crucial step for accurate shooting. Proper mounting ensures stability and precision. Let’s explore how to do it right.
Proper Mounting Techniques
First, choose the correct mount for your rifle. Align the mount with the rail on your rifle. Attach the scope mount securely. Tighten the screws evenly to avoid tilting. Check for any movement. The scope should be steady.
Tools You Will Need
Prepare the necessary tools before starting. You will need a screwdriver, a torque wrench, and a mounting kit. The torque wrench helps avoid over-tightening. A leveling tool is also useful. It ensures the scope is level. Gather all tools within reach.
Setting Up Your Environment
Ensure a clear view and stable rest for your rifle. Use a target designed for thermal imaging. Adjust the scope settings gradually for precision.
Before sighting in your thermal scope, ensure your environment is properly set up. A well-prepared setting can make the process smoother and more accurate. This section will guide you through the ideal conditions and safety precautions to consider.Ideal Conditions For Sight-in
Choose a clear day for sighting in. Avoid windy or rainy weather. These conditions can affect visibility and accuracy. Early morning or late afternoon are the best times. The sun’s position during these times reduces glare on your scope. Ensure the area is quiet and free from distractions. Background noise can disrupt your concentration.Safety Precautions
Prioritize safety in your environment. Make sure the area is free of people and animals. Use proper backstops to catch stray bullets. Always point the weapon in a safe direction. Keep your finger off the trigger until ready to fire. Wear eye and ear protection for added safety. Verify your target and what lies beyond it. This will prevent accidental injuries. Follow all firearm safety rules. Ensuring safety is crucial for a successful sight-in process. “`
Credit: www.linkedin.com
Initial Calibration
Initial calibration is crucial for accurate thermal scope performance. This process ensures your scope delivers precise targeting. Let’s walk through the steps.
Aligning The Reticle
First, set your thermal scope on a stable surface. A tripod can help. Ensure the reticle aligns with the center of the screen. Use the adjustment knobs to center it. This ensures accuracy in your aim. Double-check by viewing a distant target.
Adjusting Brightness And Contrast
Brightness and contrast affect the clarity of the thermal image. Set them to comfortable levels. Start with the default settings. Adjust the brightness until you can see clear details. Next, tweak the contrast to differentiate objects. Too much contrast can blur the image. Adjust until objects are distinct.
Boresighting Your Thermal Scope
Boresighting your thermal scope is an important step for accuracy. It helps align your scope with the barrel of your rifle. This ensures your shots are on target. You can use a boresighter tool or do it manually. Let’s explore both methods.
Using A Boresighter Tool
A boresighter tool makes the process easier. It fits into the barrel and projects a laser. This laser shows where the bullet will go. Follow these steps to use a boresighter tool:
- Place your rifle on a stable surface.
- Insert the boresighter tool into the barrel.
- Turn on the laser and look through your thermal scope.
- Adjust the scope until the crosshairs line up with the laser dot.
Manual Boresighting Tips
Manual boresighting needs more effort but works well. Follow these tips for manual boresighting:
- Remove the bolt from your rifle.
- Place your rifle on a stable surface.
- Look through the barrel to find a target.
- Adjust the rifle until the target is centered in the barrel.
- Look through your thermal scope and adjust it to match the target.
Boresighting your thermal scope this way takes patience. But it can save you time and ammo at the range.
Fine-tuning At The Range
Fine-tuning a thermal scope at the range involves adjusting the sight for accuracy. Begin by mounting the scope securely, then use a target to align the reticle. Adjust until the thermal image matches the target’s position.
Fine-tuning your thermal scope at the range is crucial for accuracy. It involves refining your adjustments after initial setup. This process ensures precise targeting in real-world conditions.Establishing A Zero Point
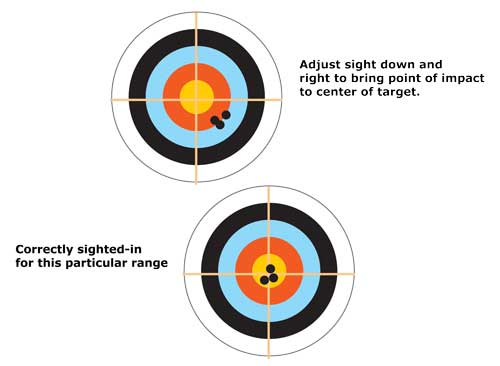
Begin by setting a stable shooting platform. Use a bench rest or bipod for consistency. Place a heat-emitting target at your desired zero range. This could be 100 yards or another distance you prefer. Fire a few shots to see where they hit. Note the shot groupings on the target. The goal is to have all shots close to the center. This marks your zero point.Making Elevation And Windage Adjustments
Adjust the elevation first. This setting controls the bullet’s vertical path. If shots hit low, raise the elevation. If high, lower it. Make small adjustments and fire another group. Next, adjust the windage. This setting moves the bullet left or right. If shots hit left of the target, move the windage right. If right, move it left. Repeat firing and adjustments until shots consistently hit the center. This process may take several attempts. Be patient. Fine-tuning ensures your scope is perfectly calibrated.Testing And Adjusting In The Field
Testing and adjusting your thermal scope in the field is crucial. You need to ensure that your scope performs well in real-world conditions. This process helps confirm the accuracy of your settings and improves your shooting experience.
Field Testing Procedures
Begin by setting up a stable shooting platform. This can be a bipod or a sandbag. Ensure you have a clear line of sight to your target. The target should be placed at a known distance. A common distance is 100 yards.
Take a few practice shots to see where your shots land. Compare the impact points with your aiming point. This will help you understand any adjustments needed. Make sure to adjust for wind and other environmental factors.
Record the data from your shots. Note the conditions and any adjustments made. This information will be useful for future reference. Continue this process until your shots consistently hit the target.
Real-world Adjustment Tips
Use a thermal target that contrasts well with the surroundings. This will make it easier to see through the thermal scope. Ensure the target is placed in a realistic setting.
Practice shooting at different times of the day. Thermal scopes can behave differently based on temperature and light conditions. Testing in various conditions will give you a better understanding of your scope’s performance.
Pay attention to the scope’s battery life. Field adjustments might take longer than expected. Always carry extra batteries. This ensures you won’t be left without a working scope.
Be patient and methodical. Rushing can lead to errors. Take your time to make precise adjustments. This will enhance your accuracy and confidence in the field.
Maintenance And Care
Maintaining and caring for your thermal scope ensures it performs well for years. Proper maintenance prolongs the life of your equipment and guarantees accurate readings. Let’s explore some essential tips on how to keep your thermal scope in top condition.
Cleaning Your Thermal Scope
Regular cleaning is crucial for the longevity of your thermal scope. Use a soft cloth to wipe the exterior. Avoid harsh chemicals that can damage the surface.
- Lens cleaning: Use a lens brush to remove dust. Apply a lens cleaner with a microfiber cloth.
- Body cleaning: Clean the body with a damp cloth. Dry it with a soft towel.
Check for any signs of wear or damage during cleaning. Addressing these issues early can prevent bigger problems.
Storing And Protecting Your Equipment
Proper storage is key to protecting your thermal scope. Store it in a cool, dry place. Avoid exposure to extreme temperatures.
| Storage Tips | Details |
|---|---|
| Temperature Control | Keep it away from heat and cold. Extreme temperatures can damage internal components. |
| Protective Case | Use a padded case for storage. This prevents physical damage during transport. |
Storing your thermal scope properly helps maintain its accuracy and functionality.
Frequently Asked Questions
What Is The Best Distance To Sight In A Thermal Scope?
To sight in a thermal scope, start at 50 yards. Adjust for accuracy and then move to 100 yards.
How Do You Zero A Thermal Scope?
To zero a thermal scope, align the reticle with the point of impact. Make small adjustments until accurate.
Can You Sight In A Thermal Scope During The Day?
Yes, you can sight in a thermal scope during the day. Use a thermal target for visibility.
What Type Of Target Is Best For Thermal Scopes?
Thermal scopes work best with heat-emitting targets. Use thermal targets or heated objects for better accuracy.
Conclusion
Sight in your thermal scope with ease using these steps. Start with a solid mount. Ensure a steady rest. Zero at a preferred range. Adjust in small increments. Practice regularly for accuracy. A well-sighted scope enhances your aim. Confidence grows with precision. Additionally, familiarize yourself with the various reticle options, as they can greatly affect your targeting abilities. Understanding your scope’s features and settings will make sighting a telescope made easy, allowing for swift adjustments in different lighting and weather conditions. Lastly, always remember to check your zero before each outing; consistent verification can significantly improve your shooting experience.
Enjoy improved shooting experiences. Follow these tips for better results. Happy shooting!

