How to Sight in a Scope for 100 Yards at 25 Yards: Expert Tips
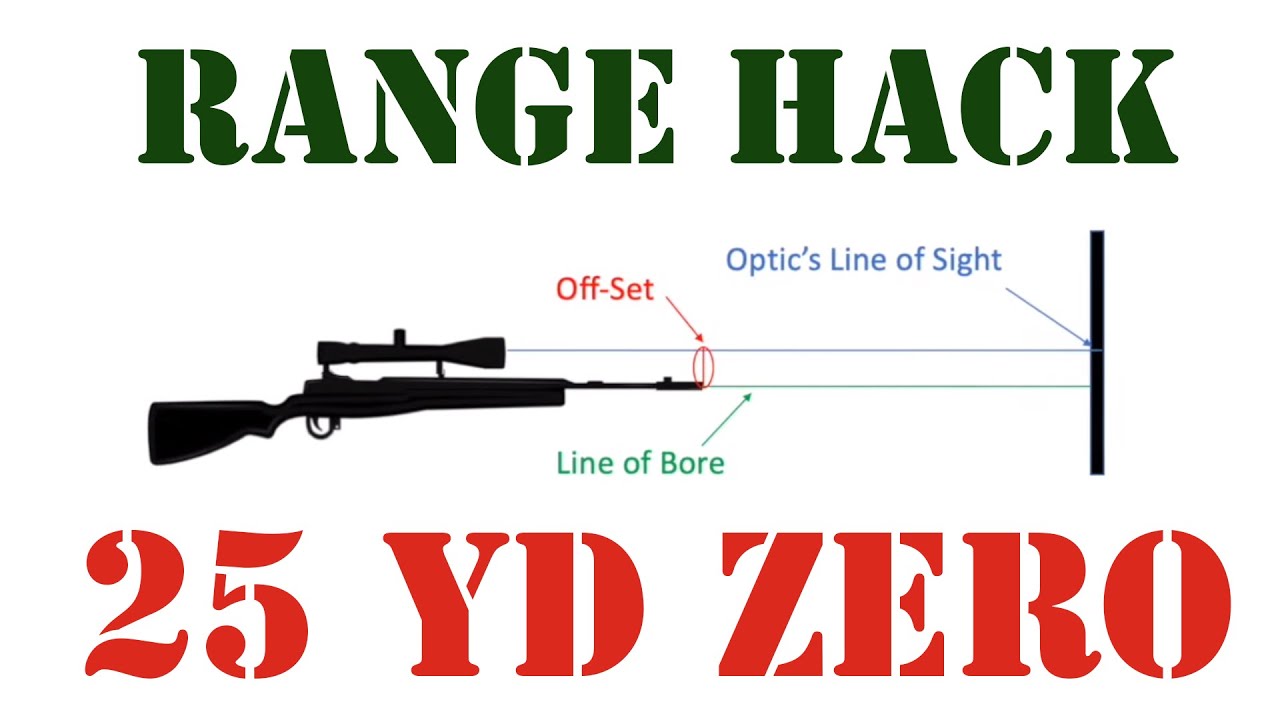
Sighting in a scope for 100 yards can be tricky. But you can do it at 25 yards.
This method saves time and ammo. When you sight in a scope at 25 yards for a 100-yard target, you get quicker results. This technique is useful for many shooters. It helps you get your scope close to perfect without using much ammo.
In this post, we will explain the steps to achieve this. You will learn how to adjust your scope correctly. By the end, you will be ready to hit targets at 100 yards with ease. Read on to find out how simple it can be.

Credit: www.youtube.com
Introduction To Scope Sighting
Sighting in a scope is crucial for accurate shooting. Whether you are a hunter or a target shooter, proper scope sighting ensures you hit your target. This guide will help you sight your scope for 100 yards at 25 yards.
Importance Of Proper Sighting
Proper sighting provides accuracy in your shots. It minimizes the risk of missing your target. Proper sighting also enhances your shooting experience. It builds confidence in your equipment and skills.
Without proper sighting, your shots may stray. This can lead to frustration and wasted ammunition. Proper sighting is the foundation of successful shooting.
Basic Principles
Understanding basic principles is key for scope sighting. First, ensure your rifle is secure. Use a stable shooting rest or sandbags to keep it steady. Stability is crucial for accurate sighting.
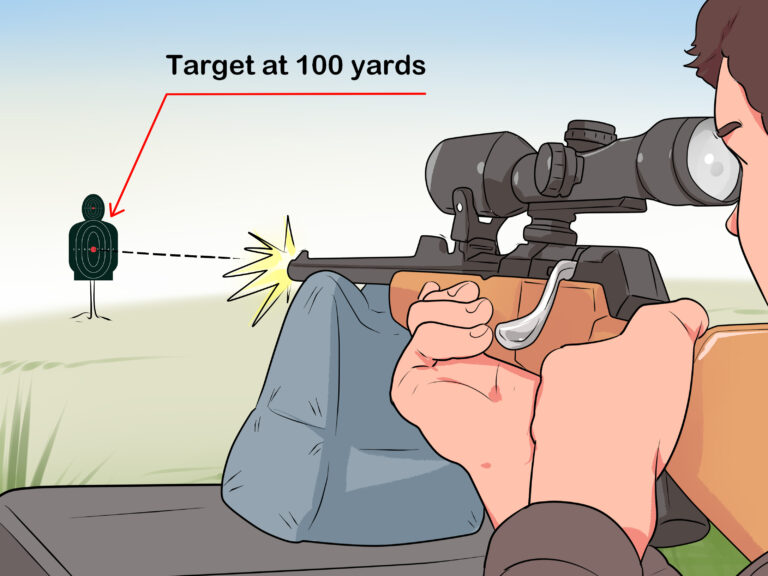
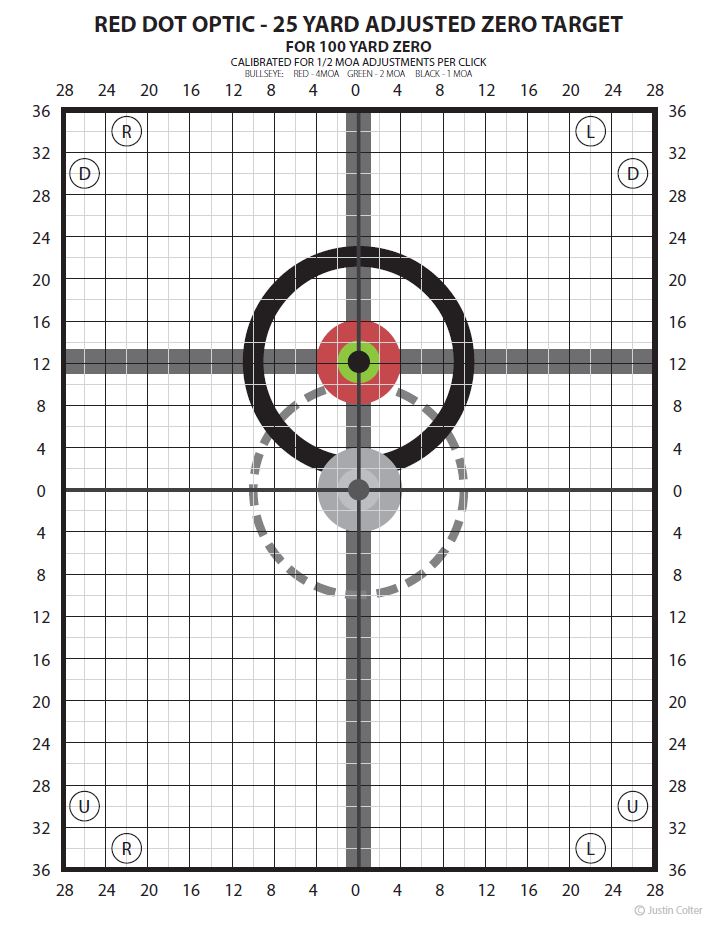
Next, align the reticle with your target at 25 yards. Adjust the windage and elevation knobs on your scope. This will bring the reticle to the point of impact. Fire a test shot and make adjustments as needed.
Repeat the process until the point of impact matches the reticle. This ensures accuracy at 25 yards. Once you are sighted at 25 yards, you can adjust for 100 yards. Use the same principles for longer distances.
Remember, patience and precision are key. Take your time to ensure accurate sighting. Proper sighting will improve your shooting accuracy and enjoyment.
Credit: www.reddit.com
Required Tools And Equipment
When learning how to sight in a scope for 100 yards at 25 yards, having the right tools and equipment is crucial. This ensures accuracy and efficiency. Below, you’ll find a list of essential gear and optional accessories that will help you achieve precise results.
Essential Gear
- Rifle and Scope: Ensure your rifle is clean and the scope is properly mounted.
- Target: Use a target with a clear bullseye at 25 yards.
- Bench or Rest: A stable bench or shooting rest minimizes human error.
- Ammo: Use the same ammo you plan to shoot at 100 yards.
- Boresighter: A boresighter helps align the scope to the barrel.
- Spotting Scope: This helps you see the target clearly from 25 yards.
- Adjustable Wrench: For any adjustments needed on the scope.
- Targets and Marker: To mark your hits and adjustments.
Optional Accessories
- Laser Rangefinder: Confirms the exact distance to the target.
- Wind Meter: Helps understand wind conditions that might affect accuracy.
- Shooting Mat: Adds comfort if you are shooting from the ground.
- Chronograph: Measures the velocity of your bullets.
- Gun Vice: Holds the rifle steady while making adjustments.
- Notebook: Keeps track of adjustments and observations.
With these tools and equipment, you can ensure a smoother and more accurate sighting process. Having both the essential gear and optional accessories can significantly improve your shooting accuracy and experience.
Setting Up The Shooting Range
Setting up the shooting range is the first step in sighting in your scope. It ensures you have a safe, controlled environment for accurate adjustments. This section will guide you through selecting the right spot, taking necessary safety measures, and preparing your shooting area effectively.
Choosing The Right Location
Find a location that offers a clear line of sight for 100 yards. This location should be free from obstacles like trees or buildings. A flat, open field is ideal. If you’re using a public range, make sure it has marked distances.
Check the weather conditions. Wind can affect your shot accuracy. Pick a day with minimal wind for the best results. Ensure the area is legal for shooting. Always follow local laws and regulations.
Safety Precautions
Safety is paramount. Always keep the muzzle pointed downrange. Never point it at anything you do not intend to shoot.
Wear ear and eye protection. Shooting can be loud and hazardous to your hearing and sight. Ensure everyone around is also equipped with protection.
Keep a first aid kit handy. Accidents can happen, so being prepared is crucial.
| Safety Measure | Details |
|---|---|
| Ear Protection | Reduces noise impact |
| Eye Protection | Shields from debris |
| First Aid Kit | Emergency response |
Follow these steps to set up your shooting range effectively. It ensures a safe and accurate sighting process.
Credit: www.thearmorylife.com
Mounting The Scope
Mounting the scope is the first crucial step in sighting in your scope. A properly mounted scope ensures that you achieve accurate shots. This process involves aligning and securing the scope to your firearm. Let’s break down the steps to make sure your scope is mounted correctly.
Proper Alignment
Proper alignment is key to accurate shooting. First, place your rifle on a stable surface. Use a gun vise or sandbags to keep it steady. Ensure your scope rings are correctly positioned on the rifle. The rings should align with the scope’s body. This keeps the scope level.
Next, place the scope in the rings. Adjust it until the reticle is visible and centered. Look through the scope and ensure it is level. Use a bubble level if needed. The crosshairs should be perfectly horizontal and vertical. This step ensures your shots are accurate.
Securing The Scope
Once the scope is aligned, it’s time to secure it. Tighten the screws on the scope rings. Start with the front ring, then move to the back. Use a torque wrench to ensure even pressure. Avoid over-tightening, as this can damage the scope.
Check the scope’s position again. Make sure it hasn’t shifted. Re-tighten the screws if necessary. Now, your scope is securely mounted. This step prevents any movement during shooting, ensuring consistent accuracy.
| Step | Action |
|---|---|
| 1 | Place rifle on a stable surface |
| 2 | Position scope rings correctly |
| 3 | Place scope in rings and align |
| 4 | Tighten screws evenly |
| 5 | Check and re-tighten if needed |
By following these steps, your scope will be properly mounted. This sets the foundation for accurate sighting and shooting.
Initial Bore Sighting
Initial bore sighting is the first step in sighting your scope. This process helps you get your rifle close to the target. This saves time and ammunition. Let’s break it down into simple steps.
Aligning The Barrel
Start by securing your rifle on a stable surface. You can use a gun vise or sandbags. Look through the barrel and center the target. Make sure the rifle is steady and does not move. This step is crucial for accuracy.
Adjusting The Crosshairs
Next, look through the scope. Adjust the crosshairs to align with the target. Use the windage and elevation turrets on your scope. Move the crosshairs until they match the target seen through the barrel. This ensures both the barrel and scope are aligned.
Repeat the process if needed. Continue until the crosshairs are perfectly aligned with the target. This sets a good foundation for further adjustments at 100 yards.
Sighting At 25 Yards
Sighting in a scope at 25 yards can save time and ammo. This method helps you get on target quickly before fine-tuning at 100 yards.
Establishing A Baseline
First, secure your rifle on a stable rest or use a bipod. This minimizes movement and ensures accuracy. Aim at the center of your target placed 25 yards away.
Fire a group of three shots. Examine the target to see where the bullets hit. These initial shots help you understand the scope’s alignment.
Making Necessary Adjustments
Now, adjust your scope based on the shot group. If the shots are high, lower the reticle. If they are left, move the reticle to the right. Make small adjustments.
Fire another group of three shots. Check the new impact points. Continue adjusting until the shots are centered on the target.
Once your shots are hitting the center, your scope is sighted at 25 yards. This baseline helps you hit the target at 100 yards with minor adjustments.
Translating To 100 Yards
Translating a 25-yard sight-in to 100 yards can seem complex. It’s essential for precision. The goal is to understand the bullet’s path and adjust the scope. This way, your shots hit the target accurately at longer distances.
Understanding Ballistic Trajectory
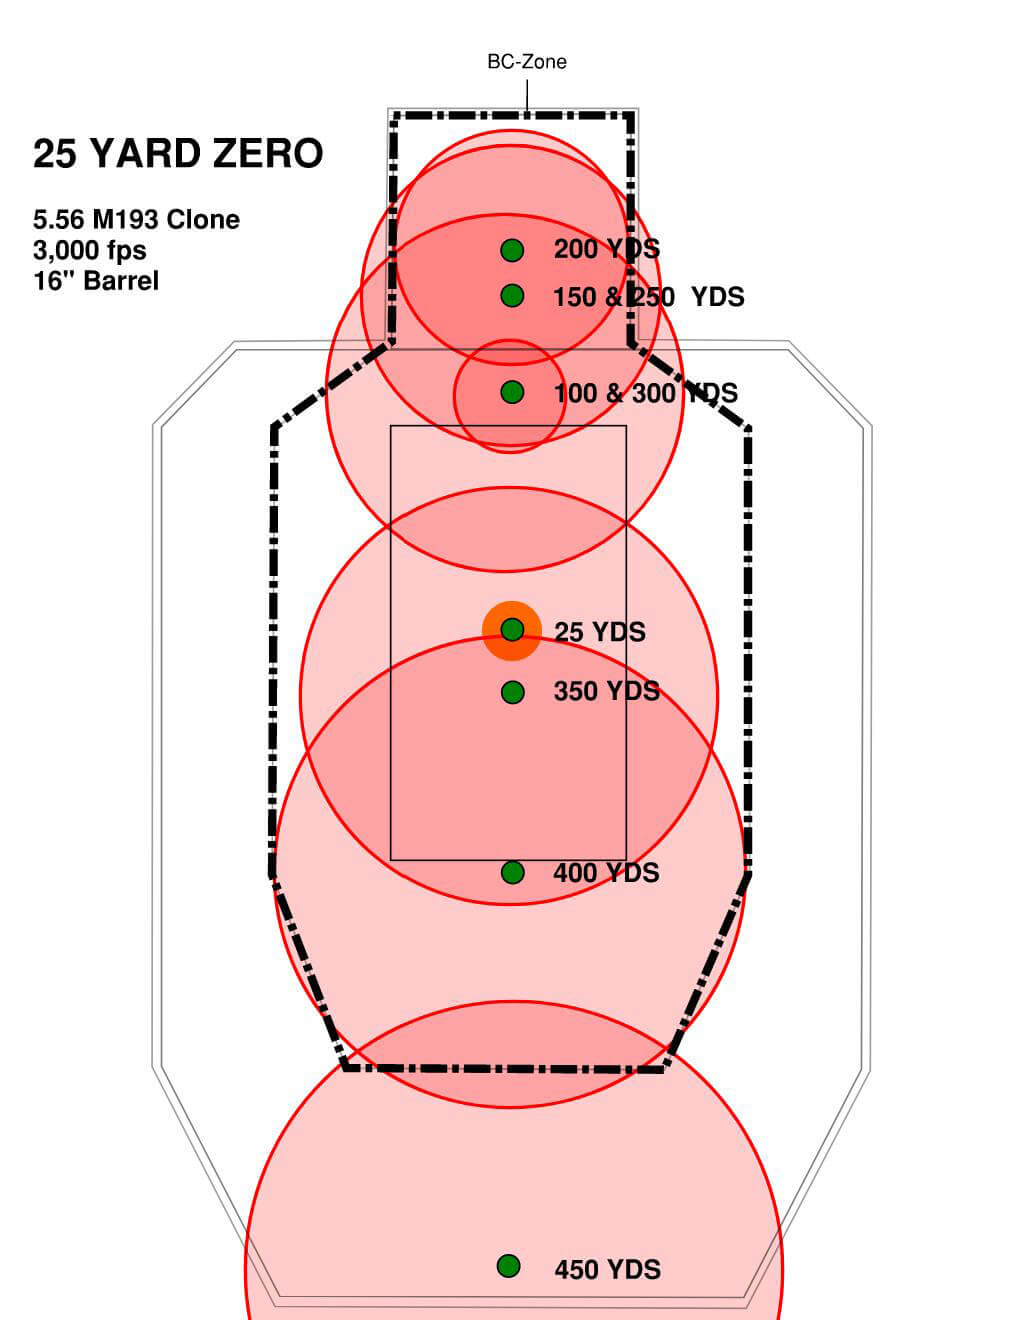
Ballistic trajectory refers to the path a bullet takes after being fired. At 25 yards, the bullet’s path is almost straight. At 100 yards, gravity affects the bullet more. It starts to drop. Knowing this helps in making precise adjustments.
Your scope needs to account for this drop. The bullet will hit lower at 100 yards. Understanding the bullet’s behavior is crucial. It helps in making the right changes to your scope settings.
Recalibrating The Scope
After understanding the trajectory, it’s time to recalibrate the scope. Start by noting where your shots land at 25 yards. Adjust the scope to center the shots. Once the shots are centered, you need to calculate the adjustments for 100 yards.
Move the target to 100 yards. Fire a few test shots. Observe where the shots land. If they land low, adjust the elevation turret. This will raise the point of impact. Continue adjusting until your shots hit the bullseye at 100 yards.
Patience is key. Small adjustments make a big difference. With practice, you will sight your scope accurately at 100 yards.
Fine-tuning And Testing
After initially sighting in your scope at 25 yards, it’s crucial to fine-tune and test your adjustments. This phase ensures your scope is precisely aligned for a 100-yard shot. Let’s dive into the necessary steps to achieve this.
Making Final Adjustments
Once you have a basic alignment, it’s time to make final adjustments. Set up your target at 25 yards. Fire a group of three shots. Inspect the shot pattern and note the point of impact.
Use the scope’s adjustment knobs to correct any deviations. Follow these steps:
- Move the scope up or down to adjust elevation.
- Move the scope left or right to adjust windage.
Repeat the process until your shots are consistently hitting the desired point.
Confirming Accuracy
After making adjustments, it’s essential to confirm your scope’s accuracy. Follow these steps:
- Set up a new target at 100 yards.
- Fire a group of three shots.
- Inspect the shot pattern.
If the shots are not on target, make small adjustments. Fine-tune the elevation and windage knobs. Repeat the process until your shots are on target. Consistency is key. Ensure each shot hits the desired point.
| Adjustment | Direction | Knob |
|---|---|---|
| Elevation | Up/Down | Top Knob |
| Windage | Left/Right | Side Knob |
Once these steps are completed, your scope should be accurately sighted for 100 yards. Remember, patience and precision are essential. Happy shooting!
Maintenance And Care
Proper maintenance and care of your scope are crucial for accuracy. If you want your scope to perform well, you need to keep it in good condition. Regular maintenance ensures it remains reliable and effective.
Cleaning The Scope
Regular cleaning keeps your scope clear and functional. Use a soft cloth to wipe the lenses. Avoid using harsh chemicals. They can damage the lens coating. A lens pen is a handy tool for cleaning. It removes dust and smudges without scratching.
Always store the scope with lens caps on. This prevents dirt and debris from accumulating. Clean the body of the scope too. It keeps it free from grime and ensures smooth adjustments.
Regular Inspections
Inspect your scope regularly for any signs of wear. Check the lenses for scratches or cracks. Make sure the mounts are secure and tight. Loose mounts can affect your accuracy. Look for any rust or corrosion on the metal parts.
Test the adjustments to ensure they work correctly. If you find any issues, address them immediately. Regular inspections help you catch problems early. This keeps your scope in top condition.
Frequently Asked Questions
What Is The Best Distance To Sight In A Scope?
Sighting in a scope at 25 yards can simulate 100 yards. This method is practical and saves time. Ensure your adjustments are accurate.
How Do You Adjust A Scope For 100 Yards?
Start by zeroing your scope at 25 yards. Make precise adjustments according to your scope’s manual. Confirm accuracy at 100 yards.
Why Sight In A Scope At 25 Yards First?
Sighting at 25 yards saves time and ammunition. It allows for easier adjustments before confirming at 100 yards.
What Tools Do I Need To Sight In A Scope?
You’ll need a stable shooting rest, a target, a scope adjustment tool, and your rifle. Follow the manufacturer’s instructions.
Conclusion
Sighting in a scope at 25 yards for 100 yards is doable. Follow the steps carefully. Use a stable rest and consistent aim. Adjust your scope in small steps. Practice regularly to improve accuracy. Patience and precision are key. Test your adjustments at 100 yards. Once you feel confident with your adjustments, it’s important to re-evaluate your progress by returning to your original 25-yard position to ensure your shots remain on target. Sighting in a rifle scope can greatly enhance your shooting experience, making it essential to approach the process diligently. Remember, fine-tuning your scope is an ongoing process, so don’t hesitate to make further tweaks as you gain more experience and skill on the range.
Your shooting skills will enhance over time. Enjoy the process and keep practicing. Happy shooting!

