How to Sight in a Laser on an AR: Expert Tips for Precision
Sighting in a laser on an AR is crucial for accuracy. It ensures your shots hit the mark.
If you’re new to using lasers on your AR, it can seem tricky. But with a few steps, you can get it right. This guide will help you understand the process. We’ll cover the basics and give you practical tips.
Soon, you’ll be more confident in your shooting. Whether you’re a beginner or just need a refresher, this information is for you. Get ready to improve your aim and hit your targets with precision.
Choosing The Right Laser
Selecting the right laser for your AR is crucial for accurate sighting. Not all lasers are created equal. The right choice depends on several factors like environment, usage, and compatibility. Below, we explore the different types of lasers and how to select the best one for your AR.
Types Of Lasers
There are various types of lasers available in the market. Each has unique features and benefits. Let’s delve into the most common types:
- Red Lasers: These are the most common and affordable. They work well in low-light conditions.
- Green Lasers: These are brighter than red lasers. They are visible in both low and bright light.
- Infrared Lasers: These are used with night vision devices. They are invisible to the naked eye.
- Laser/Light Combos: These combine lasers with a flashlight. They are versatile for various conditions.
Selecting The Best Laser For Your Ar
Choosing the best laser depends on your specific needs. Consider the following factors to make an informed decision:
- Environment: Think about where you will be using the AR. For daytime use, a green laser is ideal. For nighttime, a red or infrared laser might be better.
- Budget: Determine how much you are willing to spend. Red lasers are typically cheaper than green or infrared lasers.
- Compatibility: Ensure the laser is compatible with your AR model. Check the mounting options and power sources.
- Usage: Consider how you will use the laser. For home defense, a laser/light combo might be best. For hunting, a green laser could be more effective.
By understanding these factors, you can choose the right laser for your AR. This will enhance your shooting accuracy and overall experience.
Mounting The Laser
Sighting in a laser on an AR can seem tricky. The first step is mounting the laser correctly. This ensures accuracy and stability. Let’s dive into the essentials of mounting the laser.
Tools And Equipment
Gather the necessary tools first. You will need a screwdriver, Allen wrenches, and a mounting rail. Ensure your AR has a Picatinny rail. This makes mounting easier.
Check the laser sight package. Some come with their own mounting tools. These tools are often specific to the laser model. Keep them handy. Using the right tools prevents damage.
Proper Mounting Techniques
Position the AR on a stable surface. This keeps it steady. Align the laser sight with the rail. Slide it into place. Ensure it sits flush against the rail.
Secure the laser sight with screws. Tighten them using the appropriate tool. Do not overtighten. This can strip the screws. Check the alignment again. The laser should point straight.
Test the laser by turning it on. Make sure it stays in place. Adjust if needed. A proper mount ensures your laser stays accurate.
Initial Setup
Setting up your AR with a laser sight can improve your accuracy and target acquisition. The initial setup is crucial for ensuring your laser is correctly aligned. This process involves a few key steps to ensure everything is ready before you start shooting.
Safety Precautions
Always prioritize safety. Ensure your AR is unloaded before starting. Double-check the chamber and magazine. Remove any ammunition from your workspace. It’s vital to wear eye protection during the setup. Have a safe direction in mind to point your AR. Following these steps keeps you and those around you safe.
Preliminary Adjustments
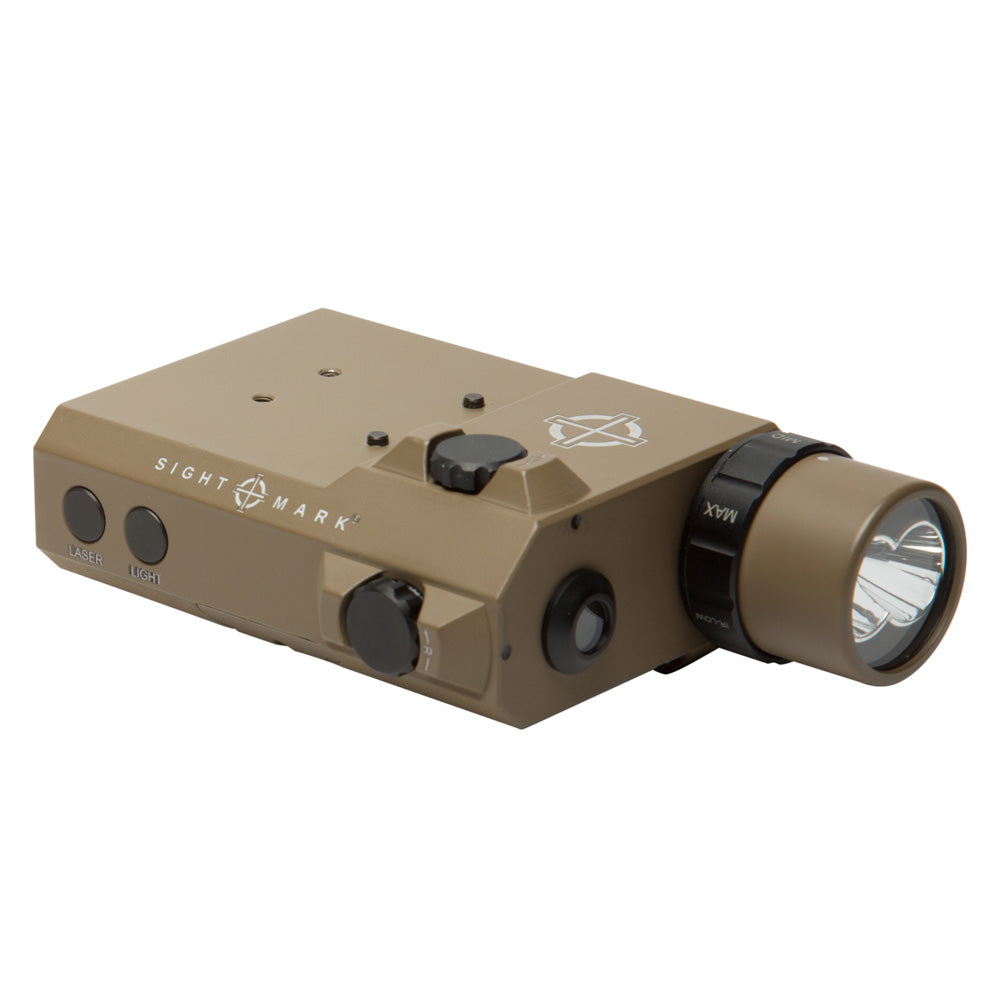
Mount the laser sight securely on your AR. Use the provided tools and follow the manufacturer’s instructions. Ensure the laser is stable and not loose. Next, adjust the laser to align with your iron sights. This initial alignment helps you make finer adjustments later.
Test the laser by aiming at a target. Check the alignment and make small adjustments. Use the windage and elevation knobs on your laser. These knobs allow you to move the laser point left, right, up, and down. Continue adjusting until the laser aligns with your point of aim.
Credit: sightmark.com
Establishing A Baseline
Establishing a baseline is crucial for sighting in a laser on an AR. This helps to ensure your laser is aligned with the rifle’s point of impact. By setting a strong foundation, you can achieve better accuracy and reliability during shooting sessions.
Setting Up A Target
Begin by placing your target at a specific distance. A common starting point is 25 yards. Ensure the target is stable and clearly visible. Use a target with distinct markings for easier adjustments. Consider using a paper target with a grid pattern. This helps in identifying alignment issues quickly.
Measuring Initial Accuracy
After setting up the target, take a few shots without the laser. This helps to understand your rifle’s current accuracy. Note where the bullets hit the target. Compare this with your aiming point. This comparison helps in identifying any misalignment.
Next, turn on the laser and aim at the same point on the target. Take a few more shots. Observe if the laser’s point of impact matches the bullet holes. If not, adjustments are necessary.
Adjust the laser according to the discrepancies noted. Continue this process until the laser and the rifle’s point of impact align. This ensures your laser is sighted in accurately.
Making Adjustments
After mounting your laser sight on your AR, it’s time to make adjustments. This ensures your laser is aligned with your rifle’s point of impact. Follow these steps to achieve precise accuracy.
Windage And Elevation
Windage and elevation adjustments are crucial. Windage adjusts the laser left or right, while elevation adjusts it up or down. Use these steps to make accurate adjustments:
- Find the windage and elevation screws on your laser sight. These are usually labeled.
- Use a small screwdriver to turn the windage screw. Adjust until the laser aligns horizontally with your sight.
- Next, turn the elevation screw. Adjust until the laser aligns vertically with your sight.
Make small adjustments and check alignment frequently. This ensures you don’t over-correct.
Fine-tuning The Laser
Fine-tuning the laser involves precise adjustments. Follow these steps for optimal accuracy:
- Set up a target at a known distance, such as 50 yards.
- Fire a group of shots to see where they hit relative to the laser.
- Adjust the windage and elevation screws slightly. Aim to bring the laser dot to the point of impact.
- Repeat firing and adjusting until the laser dot matches your shot group.
Patience is key. Small, precise adjustments yield the best results.
| Adjustment | Direction | Tool |
|---|---|---|
| Windage | Left or Right | Small Screwdriver |
| Elevation | Up or Down | Small Screwdriver |
Consistent practice and adjustment ensure your laser sight is precise and reliable. Happy shooting!
Credit: railscales.us
Testing Accuracy
Testing accuracy is a crucial step after mounting a laser on your AR. This process ensures your laser aligns with your rifle’s point of impact. It helps you achieve precise shots. Let’s explore the steps involved in testing accuracy.
Conducting Test Shots
Start by setting up a target at a known distance. Ensure a safe and controlled environment. Take a few test shots while aiming with the laser. Observe where the shots hit on the target. Make adjustments to the laser as needed. Repeat this process until your shots consistently hit the target.
Evaluating Performance
After conducting test shots, evaluate the laser’s performance. Check for consistency in the shot groupings. Ensure the laser remains stable after multiple shots. If the shots are scattered, recheck the laser’s alignment. Make any necessary adjustments. Regular testing ensures your laser performs accurately.
Troubleshooting Common Issues
Sight in a laser on an AR with ease by adjusting the laser’s windage and elevation. Ensure the laser aligns with your rifle’s sights. Test it at the range for accuracy. Once you’ve confirmed that the laser is properly aligned, practice shooting at various distances to ensure consistency in performance. Remember to make any necessary adjustments based on your results during these tests, as environmental factors like wind and bullet drop can affect accuracy. Familiarizing yourself with how to sight in a rifle will not only enhance your precision but also boost your overall confidence when shooting in the field.
Laser Alignment Problems
If your AR’s laser is not aligning properly, check for obstructions in the barrel.
Ensure the laser is securely attached and not loose to maintain alignment.
Dealing With Recoil Impact
To mitigate recoil impact on the laser, use a quality mount or stabilizer.
Regularly inspect and adjust the laser after shooting to counter recoil effects.
Maintenance And Care
Maintaining your laser sight is crucial for ensuring its accuracy and longevity. Proper care includes regular cleaning and maintenance. Neglecting these steps may lead to poor performance or damage. Follow these guidelines to keep your laser in top condition.
Cleaning The Laser
Keeping your laser sight clean is essential. Dirt and debris can affect its performance. Follow these simple steps:
- Use a soft, lint-free cloth to wipe the lens.
- Avoid using harsh chemicals. They can damage the lens coating.
- For stubborn dirt, use a mild soap solution. Dampen a cloth, and gently clean the lens.
- Ensure the laser is turned off before cleaning.
- Dry the lens with a clean, dry cloth.
Regular Maintenance Tips
Regular maintenance ensures your laser sight works effectively. Here are some tips:
- Check the battery regularly. Replace it as needed to ensure optimal performance.
- Inspect the laser mount. Ensure it is securely attached to the AR.
- Test the laser alignment. Adjust if necessary for accurate targeting.
- Store your AR and laser sight in a dry, cool place. This prevents moisture damage.
- Perform a full inspection every few months. Look for any signs of wear or damage.
Maintaining your laser sight is simple but essential. Regular cleaning and maintenance help to ensure accuracy and longevity. These steps will keep your laser sight in excellent condition, ready for use whenever needed.

Credit: www.youtube.com
Frequently Asked Questions
How Do You Sight In A Laser On An Ar?
To sight in a laser on an AR, first mount the laser securely. Next, adjust the windage and elevation settings. Finally, test the accuracy by aiming at a target and making necessary adjustments.
What Distance Should I Sight My Laser?
You should sight your laser at a distance of 25 to 50 yards. This range allows for accurate mid-range shooting. Adjust according to your primary use case.
Can I Use A Laser Sight During The Day?
Yes, but visibility may be reduced in bright sunlight. For better results, use a green laser. Green lasers are more visible during daytime compared to red lasers.
How Often Should I Re-sight My Laser?
You should re-sight your laser after any significant physical impact or change to your rifle setup. Regular checks ensure accuracy and reliability.
Conclusion
Sighting in a laser on an AR doesn’t have to be hard. Follow the steps carefully. Start by securing your rifle. Adjust the laser with small movements. Check your alignment frequently. Practice makes perfect. This process ensures accuracy. Be patient and take your time.
Soon, your aim will improve. Enjoy the confidence of a well-sighted laser. Happy shooting!

